Crochet Ribbed Border
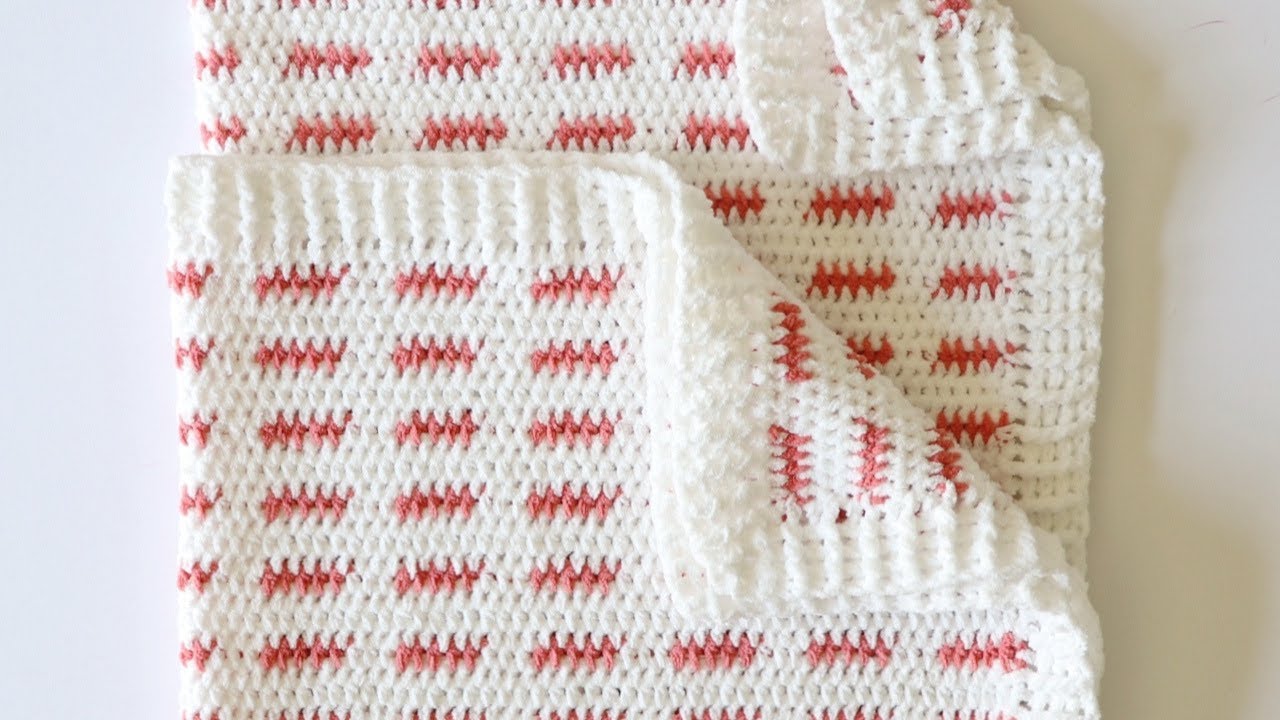
Crochet Ribbed Border - Join with a slip stitch at the end of the row to the first hdc. With so many options, you’re sure to find a. The 2nd round will give it the ribbed look and then the 3rd round will follow the same. Plus it gives a nice contrast in texture to whatever project you’re adding it to. This can be anything from simple single crochet or double crochet to elaborate crochet edgings that incorporate shells, picots and other crochet lace. Some crochet border patterns will require a certain number or multiple stitches on the edge of your crochet project. This is a video shows how to complete the border used for the super cute the hippo blanket on our website! We saw the ribbed crochet border worked in short rows, but here is a version worked around the blanket in rounds. Rs facing, join yarn in. Adding a bobble stitch border to a blanket may seem like complex work. Continuing on in the same direction.ch 8 (or any number if you’d like your border wider or more narrow.) Although, there are many other methods to adding a ribbed edge to your crochet item,. It is a very traditional looking border and can be worked on any blanket. Work one sc (or hdc) into each stitch around the edge of the blanket, working 3 stitches into each corner space.join with a slip stitch at the end of the round. Download my free instructions to complete this rib stitch granny border. If you know how to work a regular double crochet, and how. Learn how to crochet a ribbed border for edging necklines, sleeves, scarves, and more. For the full blanket pattern, visit daisyframcrafts.com: A front post dc means you insert your hook from front to back. Luckily, toni from tl yarncrafts has a great video showing you how to add this wonderful and unique crochet border to your blanket! If the number of stitches doesn't. Web today we are going to learn how to crochet rib crochet border. Then i’ll demonstrate how to change colors with a standing single crochet stitch, and add a row of single crochet before you start the ribbed edging. When you reach the corner you started with, work 3 dcs into the corner, then. Plus it gives a nice contrast in texture to whatever project you’re adding it to. Web tap photo for link to pattern. Use one appropriate for the size yarn used. Web this simple, yet interesting edging is easy to make. Pull up a loop in any corner and chain 3.dc around the entire blanket, working 3 dcs into each corner. Web learn how to add this easy ribbed crochet border to any project with this quick and easy tutorial. Any weight yarn that is appropriate for the crochet project (so if you make a baby blanket with bernat blanket yarn, you can use the same yarn for the border). It is a very traditional looking border and can be worked. If you know how to work a regular double crochet, and how. For the full blanket pattern, visit daisyframcrafts.com: Web learn how to add this easy ribbed crochet border to any project with this quick and easy tutorial. There are many other methods to adding a ribbed edge to your crochet. The list is endless, but most commonly the crochet. If you get stuck, refer to the video above. Web this border has raised ribs that align with each other in each round. I will also show you how to fix your. Before i add a crochet blanket border, i always add a single crochet border around the blanket to give me a good row to work the border into.. Join with a slip stitch at the end of the row to the first hdc. Use one appropriate for the size yarn used. Work one sc (or hdc) into each stitch around the edge of the blanket, working 3 stitches into each corner space.join with a slip stitch at the end of the round. I really like this one because. For this tutorial, i crocheted the ribbed border around a solid granny square without any gaps, which you can find here. This simple rib crochet blanket border is a great addition to any blanket. Before i add a crochet blanket border, i always add a single crochet border around the blanket to give me a good row to work the. Pull up a loop in any corner and chain 3.dc around the entire blanket, working 3 dcs into each corner stitch. When you reach the corner you started with, work 3 dcs into the corner, then go around the blanket again, this time alternating front and back post double crochet. Web how to crochet a ribbed border. This simple rib. We saw the ribbed crochet border worked in short rows, but here is a version worked around the blanket in rounds. Pull up a loop in any corner and chain 3.dc around the entire blanket, working 3 dcs into each corner stitch. Web learn how to add this easy ribbed crochet border to any project with this quick and easy. Web a crochet edging is a a border that is created by working around the finished edge of a crochet project. Web find the free ribbed crochet border tutorial at daisy farm crafts. Web tap photo for link to pattern. This post may contain affiliate links. This simple rib crochet blanket border is a great addition to any blanket. When you reach the corner you started with, work 3 dcs into the corner, then go around the blanket again, this time alternating front and back post double crochet. Web tap photo for link to pattern. Work 1 half double crochet (hdc) into each stitch, work 3 hdc into the corner spaces, and work 1 hdc per row. Web learn how to add this easy ribbed crochet border to any project with this quick and easy tutorial. Web this crochet blanket border will work on any blanket. Here is a video walk you through how to add a single crochet border. We saw the ribbed crochet border worked in short rows, but here is a version worked around the blanket in rounds. Some crochet border patterns will require a certain number or multiple stitches on the edge of your crochet project. Any weight yarn that is appropriate for the crochet project (so if you make a baby blanket with bernat blanket yarn, you can use the same yarn for the border). This simple rib crochet blanket border is a great addition to any blanket. Continuing on in the same direction.ch 8 (or any number if you’d like your border wider or more narrow.) Web camel stitch crochet blanket border. Web today we are going to learn how to crochet rib crochet border. (or you can crochet a border onto fabric or a knitted piece). This also gives me a chance to check my stitch count and adjust my stitch count if needed. It creates a rounded thick border around your.
Rib Crochet Border How to Crochet Winding Road Crochet

Rib Crochet Border How to Crochet Winding Road Crochet

Crochet Rib Border For Any Blanket Step By Step Tutorial Crafting
Back Loop Single Crochet Ribbed Border YouTube
Crochet Ribbed Blanket Border YouTube

Tutorial Ribbed Border Crochet granny square blanket, Crochet edging

How to make a CROCHET ribbed border ribbed border for sweaters YouTube

Crochet Rib Border For Any Blanket Step By Step Tutorial Crafting

Front Bottom Loop HDC Ribbed Border Crochet stitches for beginners

Crochet Rib Border For Any Blanket Step By Step Tutorial Crafting
Download My Free Instructions To Complete This Rib Stitch Granny Border.
It Is A Very Traditional Looking Border And Can Be Worked On Any Blanket.
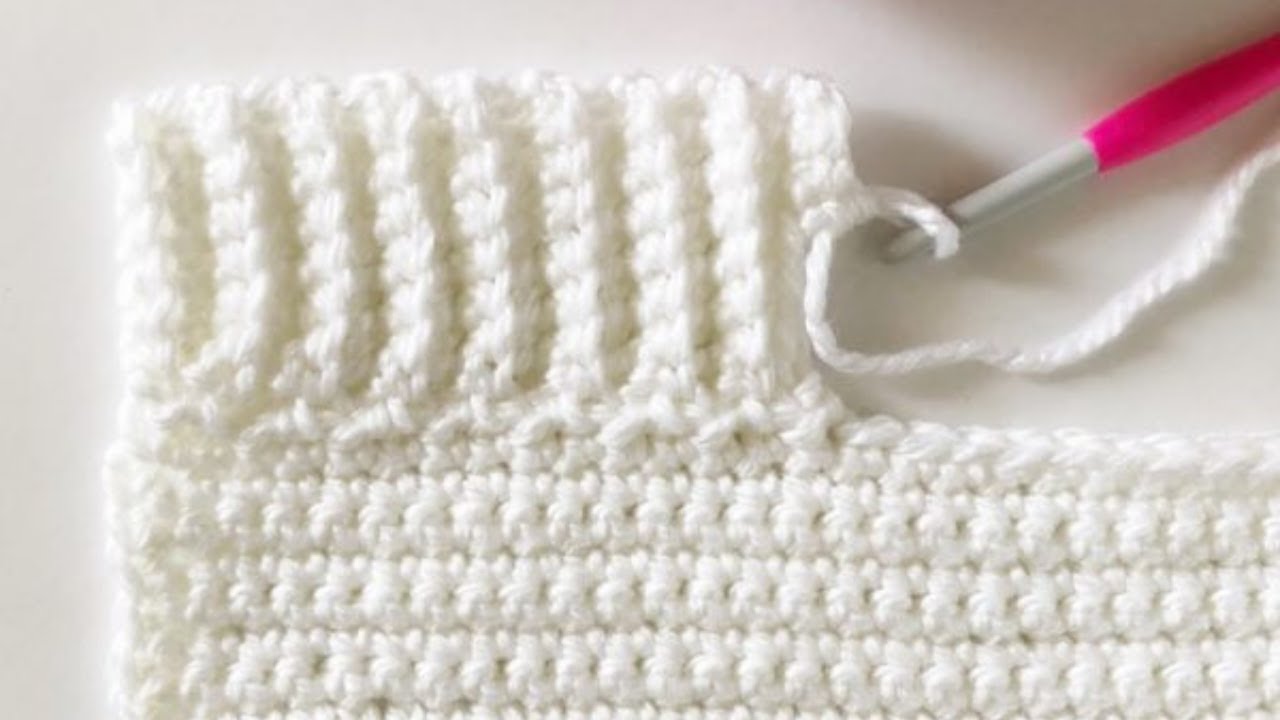
Working In The Same Direction, Chain 9, In The Third Chain From The Hook, Work Hdc And Then Work Hdc Into Each Chain For A Total Of 7 Hdc.
Web Crochet Ribbing Border Crochet Tutorial.
Related Post: