Crochet Bunny Ears Hat
Crochet Bunny Ears Hat - The designer has written the full pattern in a more worded form, whereas the last page has the pattern written in shorthand for those more experienced at reading them. Whether you’re a seasoned crochet enthusiast or a beginner eager to embark on a new project, this pattern is designed to. Web the long dangly ears for this bunny hat are adorable! This crochet bunny ear hat pattern will be a great blessing for the mom of a newly born child, and it is a quick and easy project that will add a sweet touch of spring to any baby’s wardrobe. Then you assemble it all. Web crochet bunny hat pattern for all sizes, from baby to adult. Ch 1, sc in each st across. This approachable project results in a charming accessory, ideal for beginners eager to delight with handmade gifts. 2 hdc in 1 st st and each st around (24). Easy crochet for a confident beginner. Ch 1, in first st make 2 hdc’s, 2 hdc’s in every st around, sl st to the top of the first hdc. Each ear round is not joined with a slip stitch, but instead just. This charming accessory adds an extra touch of whimsy and playfulness to a classic hat design, making it perfect for little ones. Stay snug and stylish with this adorable accessory! Web crochet bunny hat pattern for all sizes, from baby to adult. The pattern is said to be easy to follow and super detailed, with one reviewer mentioning that they had to add extra rows to adjust the sizing. The hat part and ears are crocheted separately, so you will want to go about joining those at the end. Sew the nose onto the hat. Make 2 (work ears in continuous rounds) the ears are worked in rounds using three different colours be sure to note when colour changes occur. Whether you're a seasoned crocheter or a complete beginner. Free & easy crochet bunny hat pattern for all sizes, from baby to adult. Web i’m sharing an adorable easy crochet hat pattern with bunny ears that is surprisingly simple to make. Crochet sock bunny hat pattern by pretty darn adorable. The pattern is said to be easy to follow and super detailed, with one reviewer mentioning that they had. Web the only thing more adorable than an itty bitty bunny? This sweet little bunny hat is perfect for easter, valentines for a great halloween costume, a whimsical photo prop, or. In second ch from the hook make 4 hdc’s, sl st to the top of the first hdc to join in a circle (4) (or use a magic circle);. In second ch from the hook make 4 hdc’s, sl st to the top of the first hdc to join in a circle (4) (or use a magic circle); Use gray yarn for the outer ear; Good thing too, because we have a brand new and super adorable bunny beanie with ears free crochet pattern to use for easter!. This. Then you assemble it all. Whether you’re a seasoned crochet enthusiast or a beginner eager to embark on a new project, this pattern is designed to. Make 2 (work ears in continuous rounds) the ears are worked in rounds using three different colours be sure to note when colour changes occur. This beanie hat comes in 4 different sizes. Web. Made with super bulky yarn, you can whip these up in a flash! Have fun hopping along in this floppy bunny ears beanie this easter. This beanie hat comes in 4 different sizes. Each ear round is not joined with a slip stitch, but instead just. Hdc in 1 st st and each st around (24). Web the only thing more adorable than an itty bitty bunny? Web long eared bunny hats have become super popular as of late, but here is a shorter and subtler free bunny ear beanie crochet pattern! Use gray yarn for the outer ear; The change will be in shown by “cc” indicating a colour change needs to be made to. Written instructions for the crochet bunny hat pattern with moving ears beanie. Fold ear in half and stitch the bottom 4 stitches on each side together to form a ring at the base. Web the only thing more adorable than an itty bitty bunny? Ch 1, sc in each st across. This approachable project results in a charming accessory, ideal. Overall, it’s a fun and simple pattern that’s sure to result in an. Follow the steps above for the ears; Make 2 (work ears in continuous rounds) the ears are worked in rounds using three different colours be sure to note when colour changes occur. This adult sized hat is fun and easy to make. 2 hdc in 1 st. The change will be in shown by “cc” indicating a colour change needs to be made to the. An itty bitty human pretending to be an itty bitty bunny. Web how to crochet a bunny hat: 2 hdc in 1 st st and each st around (24). Web long eared bunny hats have become super popular as of late, but. Crochet sock bunny hat pattern by pretty darn adorable. Easy crochet for a confident beginner. This crochet bunny ear hat pattern will be a great blessing for the mom of a newly born child, and it is a quick and easy project that will add a sweet touch of spring to any baby’s wardrobe. Web stuff with batting and stitch. This approachable project results in a charming accessory, ideal for beginners eager to delight with handmade gifts. The designer has written the full pattern in a more worded form, whereas the last page has the pattern written in shorthand for those more experienced at reading them. Good thing too, because we have a brand new and super adorable bunny beanie with ears free crochet pattern to use for easter!. Web long eared bunny hats have become super popular as of late, but here is a shorter and subtler free bunny ear beanie crochet pattern! The hat part and ears are crocheted separately, so you will want to go about joining those at the end. Easy crochet for a confident beginner. The design also comes with ideas for adding a flower or hat to the pattern. This sweet little bunny hat is perfect for easter, valentines for a great halloween costume, a whimsical photo prop, or. In second ch from the hook make 4 hdc’s, sl st to the top of the first hdc to join in a circle (4) (or use a magic circle); Web a simple crochet floppy bunny ears hat pattern combines ease of making with an endearing outcome. Web the only thing more adorable than an itty bitty bunny? Fold ear in half and stitch the bottom 4 stitches on each side together to form a ring at the base. Leave a long tail to allow you to sew the ear to the hat. Web the long dangly ears for this bunny hat are adorable! Ch 1, in first st make 2 hdc’s, 2 hdc’s in every st around, sl st to the top of the first hdc. The change will be in shown by “cc” indicating a colour change needs to be made to the.
25 Free Crochet Bunny Hat Patterns (Bunny Ears Pattern)

Bunny Hat Crochet Pattern Crochet Dreamz
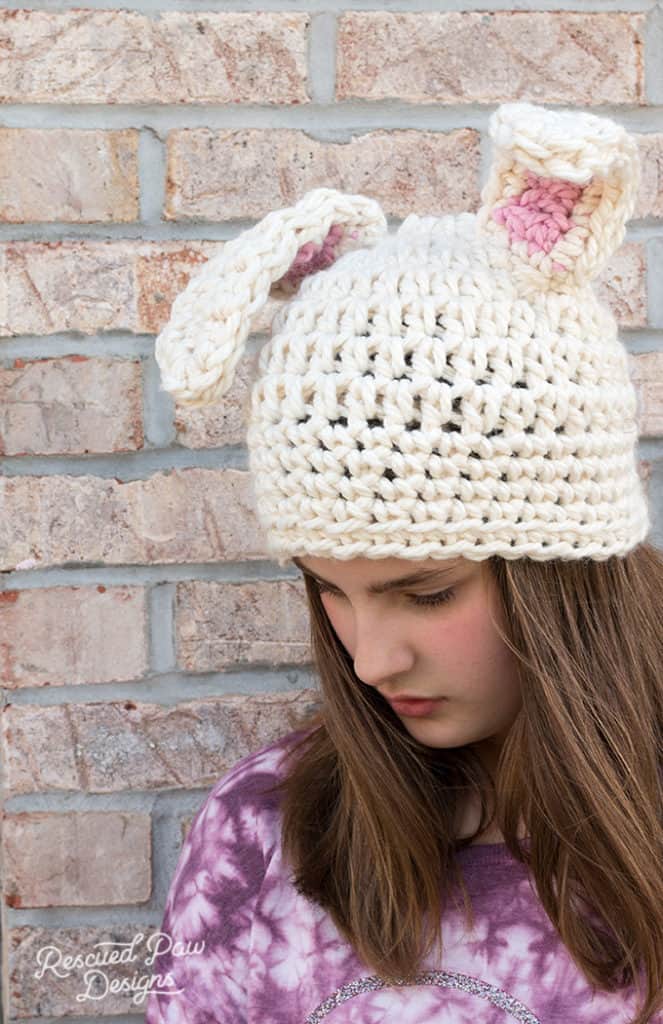
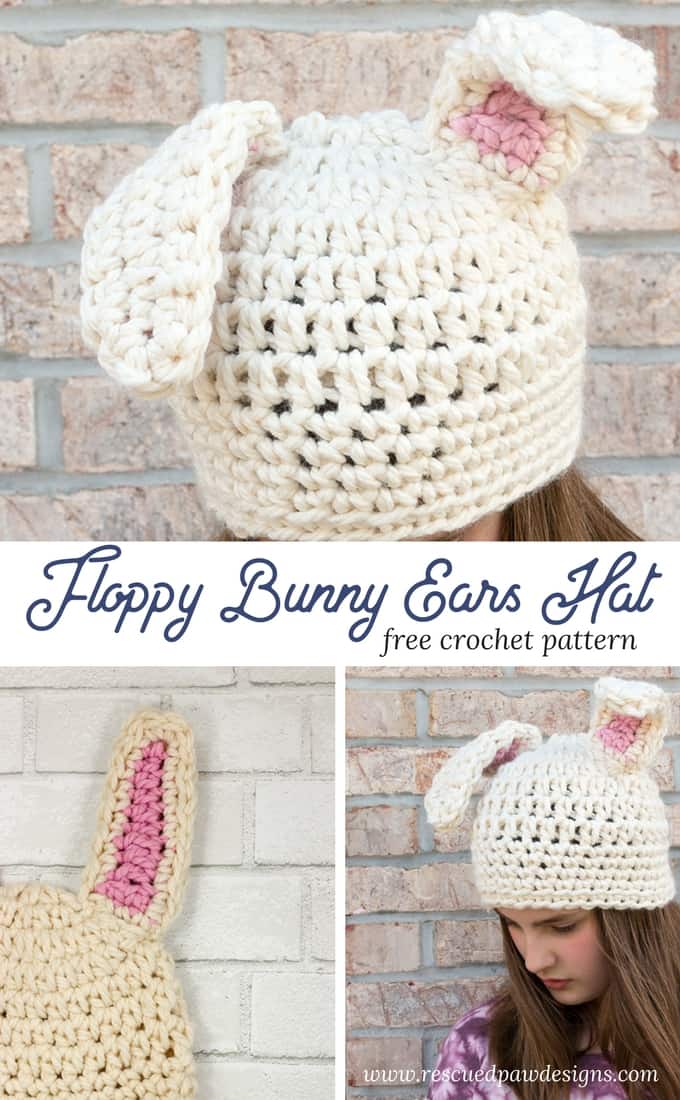
Crochet Floppy Bunny Ears Hat Easy Crochet
Bunny Ear Hat Crochet Pattern FREE (Floppy Ears)

Bunny Hat Crochet Pattern Crochet Dreamz

Crochet Floppy Bunny Ears Hat Rescued Paw Designs

Floppy Bunny Ears Beanie Free Crochet Pattern Krazy Kabbage

Easy Crochet Bunny Ears for Beanie (Beginner Tutorial) YouTube
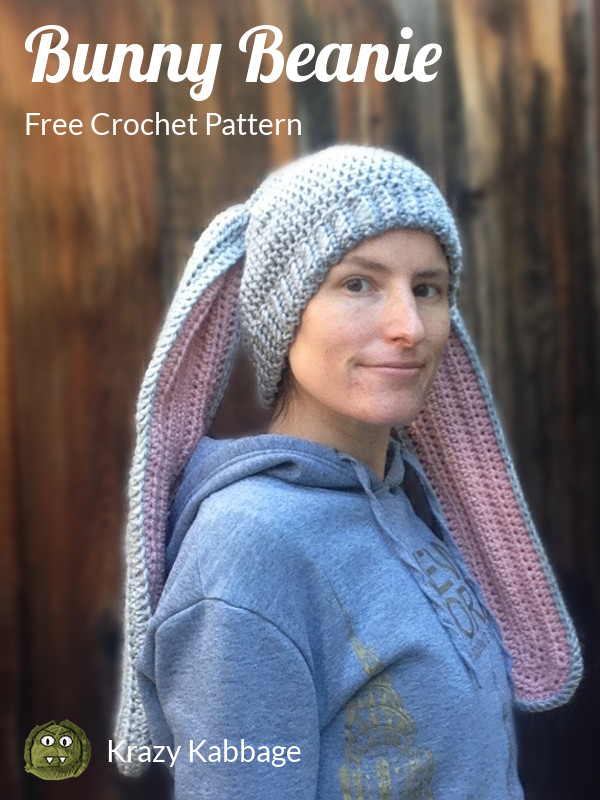
Floppy Bunny Ears Beanie Free Crochet Pattern Krazy Kabbage
Crochet Baby Hat Bunny Ears Amelia's Crochet
Whether You’re A Seasoned Crochet Enthusiast Or A Beginner Eager To Embark On A New Project, This Pattern Is Designed To.
Web I’m Sharing An Adorable Easy Crochet Hat Pattern With Bunny Ears That Is Surprisingly Simple To Make.
Use Gray Yarn For The Outer Ear;
Skip The Ch Closest To The Hook And Sc In The Next 4 Ch.
Related Post:
